
Porsche 993 fog-light housing restoration
epj993 opened the bonded glass lenses, cleaned and repainted the housings, then resealed and realigned his fog lights. His account includes the destructive flange-removal step, a repaint after trial fitting, and a later report of almost two years without fading or chipping.

Select a photo to view its source post. The source may require sign-in.
A yellow appearance and uneven marker-light fill
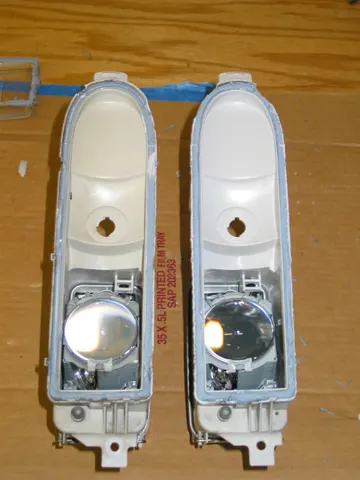
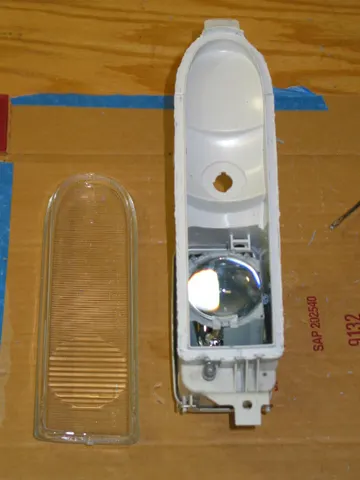
epj993 restored his 993 fog lights because they looked slightly yellow and the marker lights did not evenly fill the lenses. He credited earlier Rennlist discussions and used a damaged donor fog light supplied by kkim to test separation before working on his own. Once opened, his own housing was less yellow inside than the donor. The comparison photograph therefore shows two different housings, rather than a before-and-after pair from one lamp.
Opening the glued lens channel
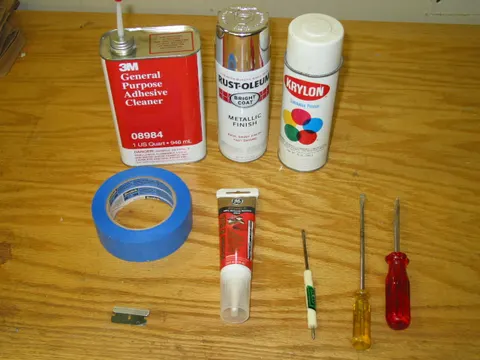
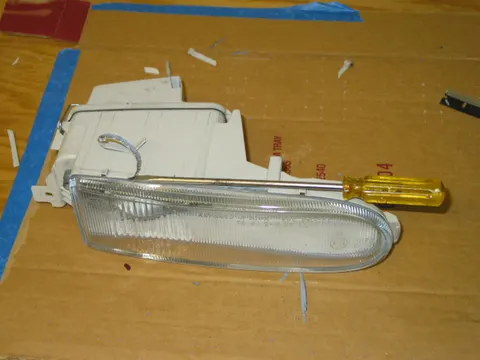
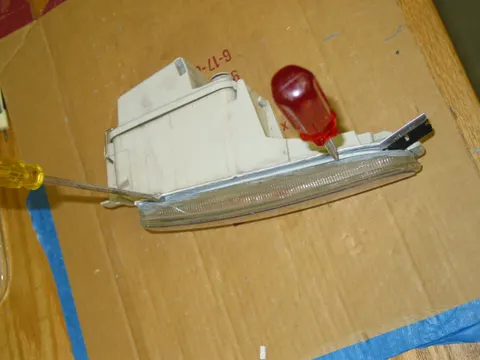
After removing the bumperettes, fog lights and parking-light bulb, the owner exposed the strong gray adhesive securing the glass in a U-shaped channel. He described Jeff A 993’s Dremel method of cutting away the channel’s outer flange. Without a Dremel himself, he instead rocked a flat screwdriver along the channel to break away the plastic edge, then cut the adhesive with a razor and separated the lens using two screwdrivers. This deliberately sacrificed part of the outer flange. His explicit warning was that forcefully prying the lens could crack the housing or glass; the account is not a nondestructive disassembly method.
Cleaning the channel and lens
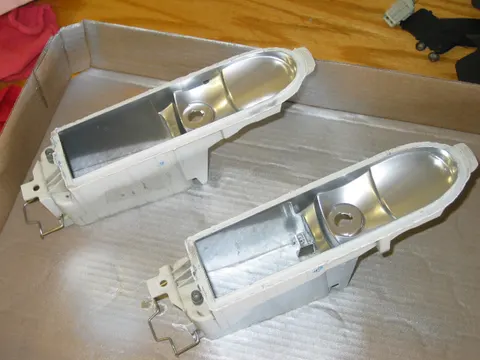
The owner removed old adhesive from the channel and glass with a thin flat screwdriver and razor, and found 3M adhesive remover helpful on the glass. He wiped the housing interior with a damp cloth and let it dry. The photographs distinguish the opened channel, the donor comparison and the cleaned housing; they do not establish that every aged housing will tolerate the same separation.
Primer, chrome paint and a second pass
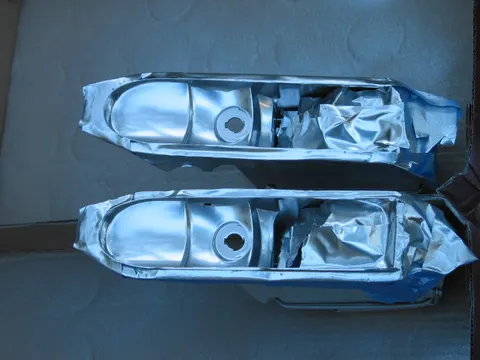
He initially masked the fog lamp, its base and the sealing channel, applied one or two light primer coats, then one to three very light chrome-paint coats following the can’s instructions. He warned that the thick paint could run easily. A trial lens fit revealed obvious unpainted areas, so he removed the fog-lamp unit and repainted the entire housing. That correction is part of the actual work sequence: the initially masked arrangement was not his final finish.
Resealing and realigning the lights
The glass was washed and dried. Scratch X on the outside removed accumulated residue, but the owner explicitly said it did not remove chips or pitting. He used GE Silicone II Door and Window Sealant in a continuous bead along the channel, centered the lens and held it with blue tape for a 24-hour cure. After refitting, he referred to the owner’s manual for beam alignment. These are the materials and timing reported in this job, rather than an independently verified sealant specification or lighting-performance test.
The result, cost and time reported
epj993 thought the light filled the lens better and looked whiter after restoration, while acknowledging that his camera struggled to show the true colors. He reported a total cost below US$15 at the time of the post, one day for preparation, painting and curing, another day for the sealant, and about ten minutes to refit. This was an appearance assessment of his lights, not a measured improvement in beam output.
What the owner had and had not tried
Responding to suggestions, the owner said his automotive primer listed both metal and plastic as suitable surfaces. Warming the adhesive in an oven and trying a windshield-repair filler on the donor lens were ideas he might test, not completed parts of this restoration. No successful chip-filling result was reported in that reply.
Almost two years without fading or chipping
In a later reply, epj993 said the restored lights had been installed for almost two years without fading or chipping. He subsequently switched to a Euro bumper and TechArt lights, which he said he treated similarly. The nearly two-year report relates to the original restored lights; it does not establish the same duration for the later TechArt set or guarantee other paint-and-housing combinations.
Separate suggestions from other members
kkim suggested that heat might soften the adhesive, citing work on Honda headlights, but explicitly questioned whether the Porsche adhesive would behave the same way. JasonAndreas suggested a plastic adhesion promoter such as Bulldog. These were separately attributed suggestions, not tested steps or confirmed improvements in epj993’s documented work.
Source reply ↗ · kkim
Source reply ↗ · JasonAndreas