
Mercedes-Benz R230 SL350 centre-console catch repair
HatManSan repaired a broken catch in a client's SL350 with a hooked panel nail secured in epoxy, then reported that the client said it was still working a month later. The account describes his removal and alignment work; the car's year and engine are unknown.

Select a photo to view its source post. The source may require sign-in.
The client's SL350 and broken catch
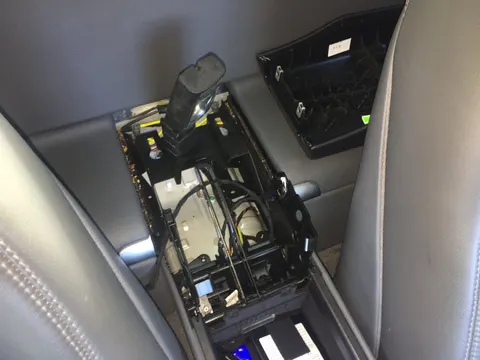
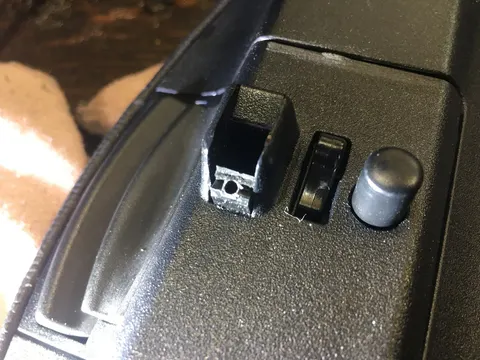
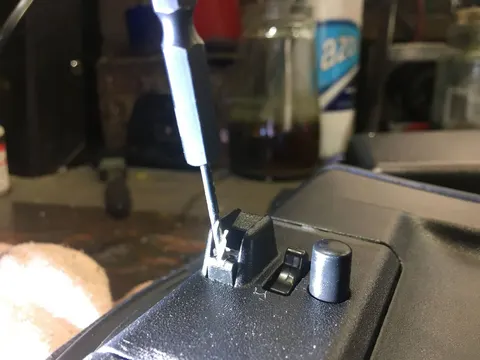
HatManSan said the client’s SL350 had 48,000 miles and a snapped centre-console catch whose broken piece could not be found. He did not give the car’s model year or engine. To remove the lid, he removed two screws at the rear of the compartment and lifted the rear armrest, disconnected the phone-module plug, then used expanding clamps to spread the metal sides until the lid came free. He estimated that getting the lid out took about five minutes.
A separate bonded-lid operation
Tom Manning described a different problem on his 2005 SL500: the finger-operated release tab had become dislodged. In a later reply he said the inner lid assembly was strongly glued and described forceful separation followed by regluing. HatManSan’s original hook repair does not describe splitting that bonded inner cover. These are separate operations; the forceful lid-separation reply is not a step in the original repair.
A hooked panel nail and an alignment check
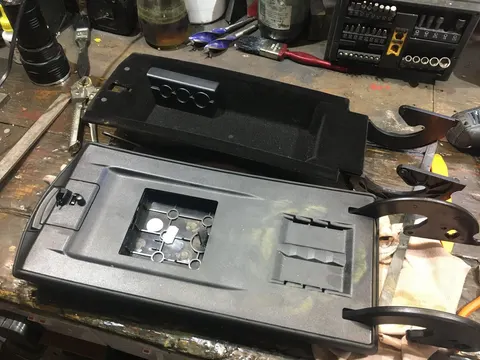
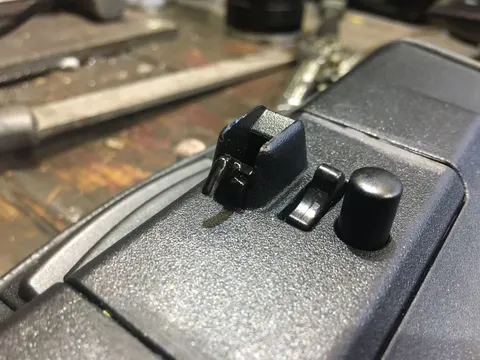
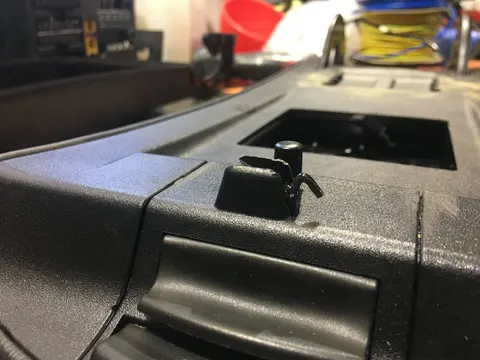
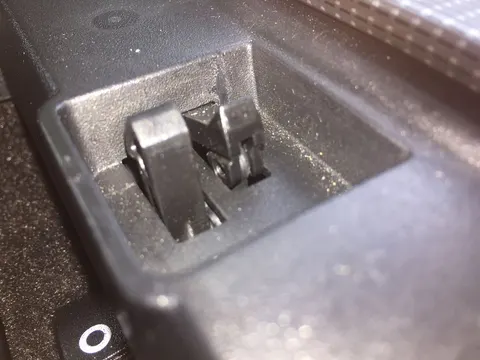
At the bench, HatManSan drilled a 2.5 mm hole about 10 mm into the broken catch stub, bent a panel nail into a hook and glued it in place with epoxy. He said the first tray also acts as the lid’s catch receiver; aligning the tray let him set the hook height. After the epoxy set, he gave the hook a light coat of black paint. He warned that drilling at a constant angle matters because the bit could break through the side. The client later told him the repair was still working after one month; the thread gives no longer-term result.
Another owner described a screw-and-pad variation
In a separate reply, aegea said they repaired two 2003 or 2004 500SL centre consoles by drilling a hole and inserting a small screw as the latch catcher. aegea said the screw head protruded less than a quarter inch and that a 1/16-inch drill bit was used. For the other latch, whose release did not move down far enough, aegea added double-sided pads under the shelf to raise it. These are the commenter’s separate vehicles and method, not HatManSan’s repair or confirmation that either approach fits every SL.
Source reply ↗ · aegea